How to Create a Guest Network with D-Link Router
Do you always hesitate when a guest asks you for the wireless network password? Sure, you cannot deny it, especially if the person asking is family. To save yourself from these awkward situations and keep your network safe you can turn on this common feature known as a guest zone which can be found easily in the new routers these days. Guest Zones, as the name given by D-Link, allows the router to run two wireless networks simultaneously that are completely different from each other but share the same internet connection.
For keeping the guests away from accessing my personal files on the home server, I use the guest zone feature. You can do the same to keep your personal files safe from the guests. Follow the following steps for enabling this feature on your D-Link Routers.
More articles regarding this would be posted as I get hands-on with the devices from different manufacturers. If you have any question or comment, please use the contact form or mail us at contact@buytechbymind.com
Hardware Used – D-Link DIR 819
Software Used – Firmware 1.06
Step 1
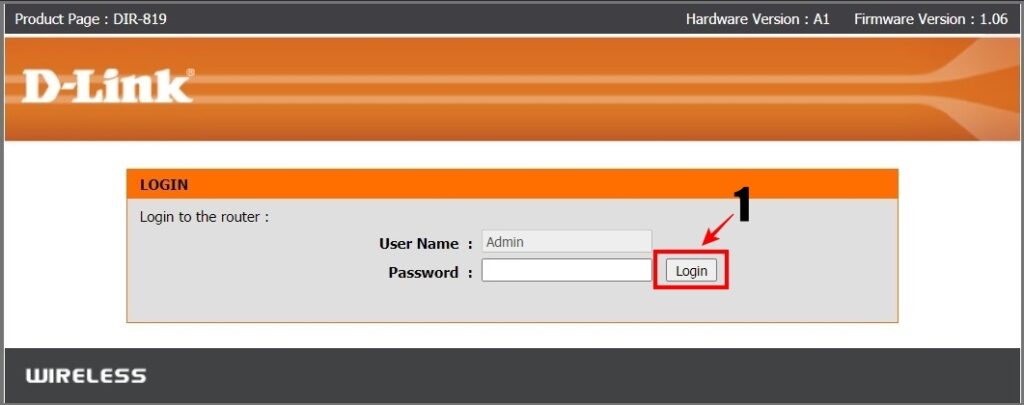
Open the browser and visit http://192.168.0.1, You will be redirected to the login page
Note: This is the default IP Address used to communicate with the Graphic Interface of the Router, if during the initial setup this IP Address was changed then use the changed IP Address
Enter the credentials and tap on Login Button.

Step 2
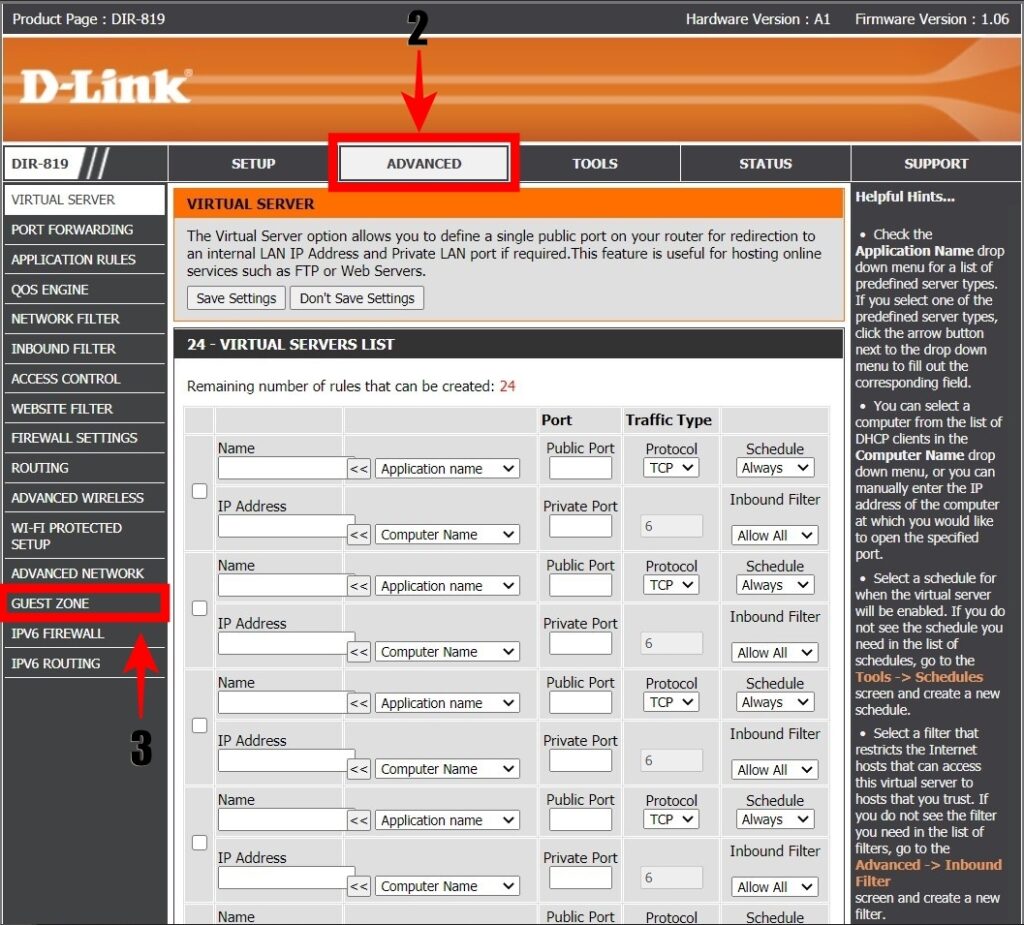
Once you are logged in, then click on Advance Tab.

Step 3
The menu on the left would be changed as you move to advance tab, Click on the Guest Zone.
The Guest Zone page has a various section which we will discuss, read this information carefully so that the guest network can be configured correctly.
Step 4
Check the Enable Guest Zone for the frequency you want the guest network for.
New Schedule: The New Schedule allows you to set the timing for when the Guest Zone would be available. I prefer to keep Guest Zone always enabled so that guests can access the network whenever they need it. You can set the pre-defined or create a new one according to the use.
Wireless Band: The wireless band allows you to choose the frequency for the network
Wireless Network Name: The Wireless Network Name is the name which will be appeared when someone tries to connect to the network. You can choose any name of your choice. In my case I have named it BuyTechByMind_guest
Security Mode: You can choose the type of security you want for the network. If you need to know more about the different types of securities and their features then do read our dedicated article about this.

Step 5
Enabling Routing Between Zones: When enabled this allows the guest user to access the devices on your Local Network and if this is disabled then the connectivity of the guest user will only be limited to the internet.
Step 6
Once the configuration for the guest zone is done, click on Save Settings. The router would be rebooted to apply the changes done. Once the router is rebooted you can see the router’s SSID in your Wireless Network List.

If you have any comment or questions, feel free to comment down below.


